Dual Bracket Self-Aligning and Self-Leveling Hanger
Installation is as easy as 1, 2, 3!
Tools needed: Tape measure, level, masking tape, pencil, screwdriver (power drill and anchors for solid surfaces)
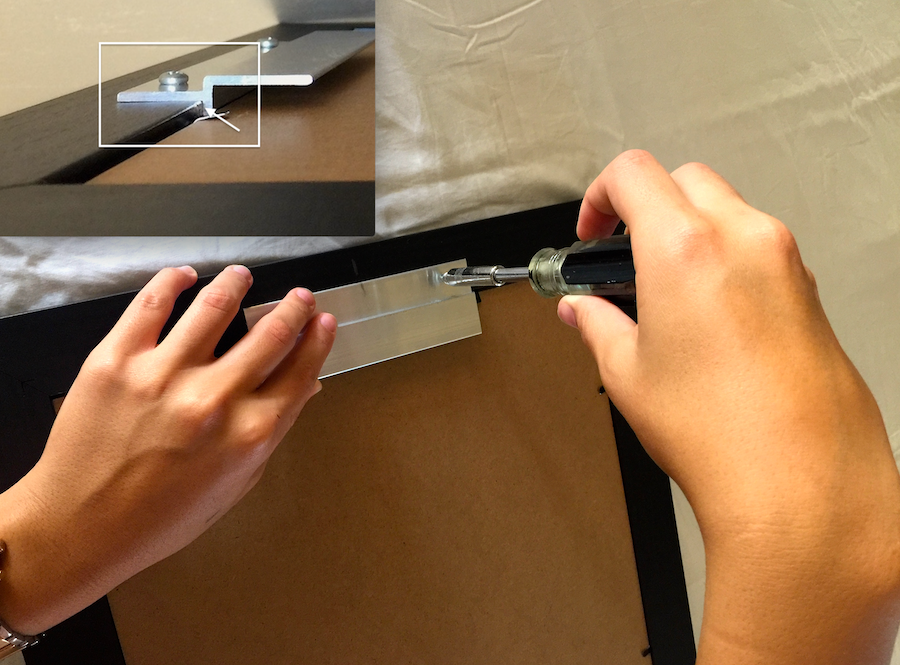
Step 1
Lay your frame face down on a flat surface. Place the self-aligning and self-leveling frame bracket on the back of the frame. Push the self-aligning bar against the bottom edge of the frame molding. While holding the bracket in place, secure it to the frame with the enclosed screws.
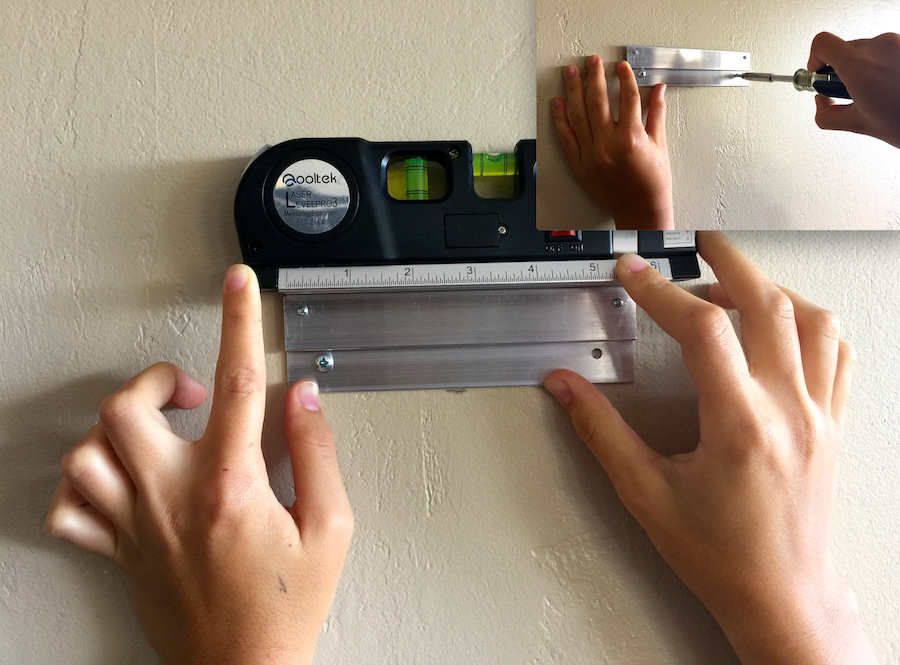
Step 2
Predetermine where your frame will go on the wall and mark it with a long strip of masking tape.
Drywall Surface: Place the bracket on the wall. While holding the bracket in place, use a level to make sure it is perfectly level before you gently push the spacers/position markers on each end into the drywall. Let go and check to make sure the bracket is still level before you drive in the screws to secure it to the wall.
Solid Surface (wood, plaster, stucco, brick, tile): Place bracket on the wall (remember to unscrew the spacer screws by about 1/8″). Mark the screw holes with a pencil. Drill the wholes using a power drill and a drill bit. Slide anchors in the wholes and drive in the first screw. Don’t over tighten. Make sure the bracket is perfectly level before you drive in the other screw(s). Tighten the spacer screws until they contact the surface.
Step 3
Align the frame and the frame bracket with the wall bracket. Then slide the frame bracket into the wall bracket. Make sure the brackets are interlocked before letting go of the frame. You can adjust the frame to the left or right for perfect positioning.
Single Bracket Level Hanger
Installation is as easy as 1, 2!
Tools needed: Tape measure, level, masking tape, pencil, screwdriver (power drill and anchors for solid surfaces)
Step 1
Predetermine where your frame will go on the wall and mark it with a long strip of masking tape.
Drywall Surface: Place the bracket on the wall. While holding the bracket in place, drive in the first screw but don’t over tighten. Use a level to make sure it is perfectly level before you drive in the other screw(s).
Solid Surface (wood, plaster, stucco, brick, tile): Place bracket on the wall. Mark the screw holes with a pencil. Drill the wholes using a power drill and a drill bit. Slide an anchor into each whole and drive in the screws to secure the bracket onto the surface.
Step 2
Align the frame and the wire with the wall bracket. Then slide the wire into the wall bracket. Make sure the wire is securely resting in the u-channel of the wall bracket before letting go of the frame. Using a level you can adjust the frame to the left or right for perfect positioning.